
- Video
- Thesis: Design, Modeling, Control and Integration of Thrust Vectoring Rotors in Micro Aerial Vehicles
Rotor and Rotorcraft CAD Design and Production Files: Fusion A360
Harmonic modulation motor driver firmware: h-brenne/moteus-vector-uav
Thrust Vectoring Rotor and Rotorcraft Simulation: h-brenne/coaxial_thrust_vector_uav_model
PX4 Autopilot Thrust Vectoring Rotor Control Allocation: h-brenne/PX4-thrust-vector-control
This repository contains a program for controlling the Moteus open-source motor driver to enable thrust vector control for aerial vehicles with just a single actuator. The program is designed to run on a Raspberry Pi with the Moteus Pi3Hat CAN adapter and custom moteus firmware h-brenne/moteus-vector-uav.
The repo consists of a cpp project, and python scripts to analyze data.
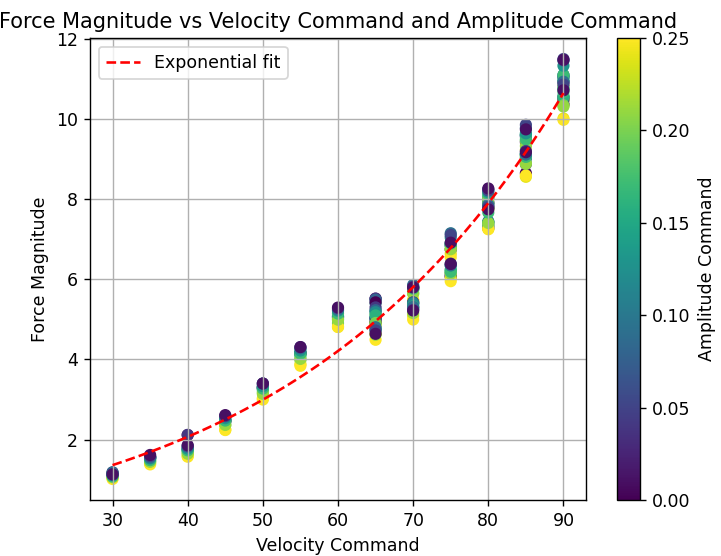
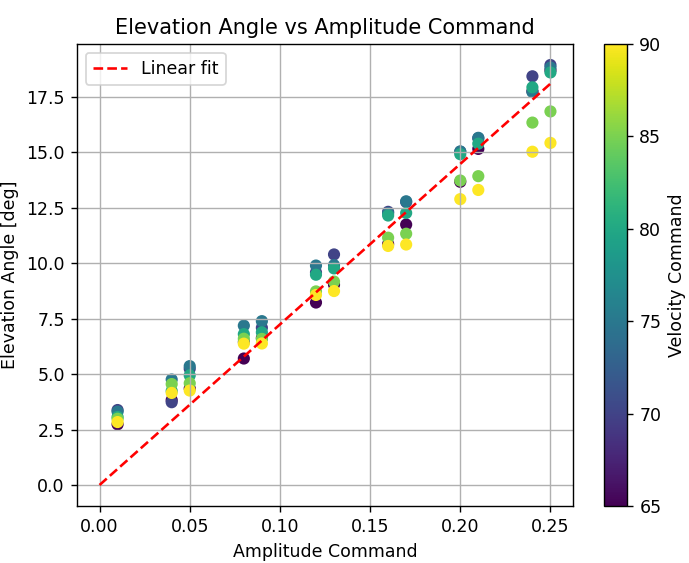
There are two main operation modes, calibration and the thrust vector controller. In calibration, a sequence of motor commands are sent. Using data from a 6-axis force/torque sensor, the relationship between motor commands and thrust vector can be made. The thrust vector controller takes thrust vector setpoints, and sends motor commands based on the relationships found from calibration. These thrust vector setpoints will typcially come from a flight controller.
Please refer to CMakeLists.txt.
With a raspbian-lite image, the following packages required manual install.
sudo apt-get install pip cmake pigpio
sudo pip3 install moteus-pi3hatTo build the code, follow these steps:
- Clone the repository:
git clone https://github.com/h-brenne/thrust_vector_control.git- Navigate to the repository directory:
cd thrust_vector_control- Create a build directory and navigate to it:
mkdir build && cd build- Run CMake to generate the build files:
cmake ..
- Build the program:
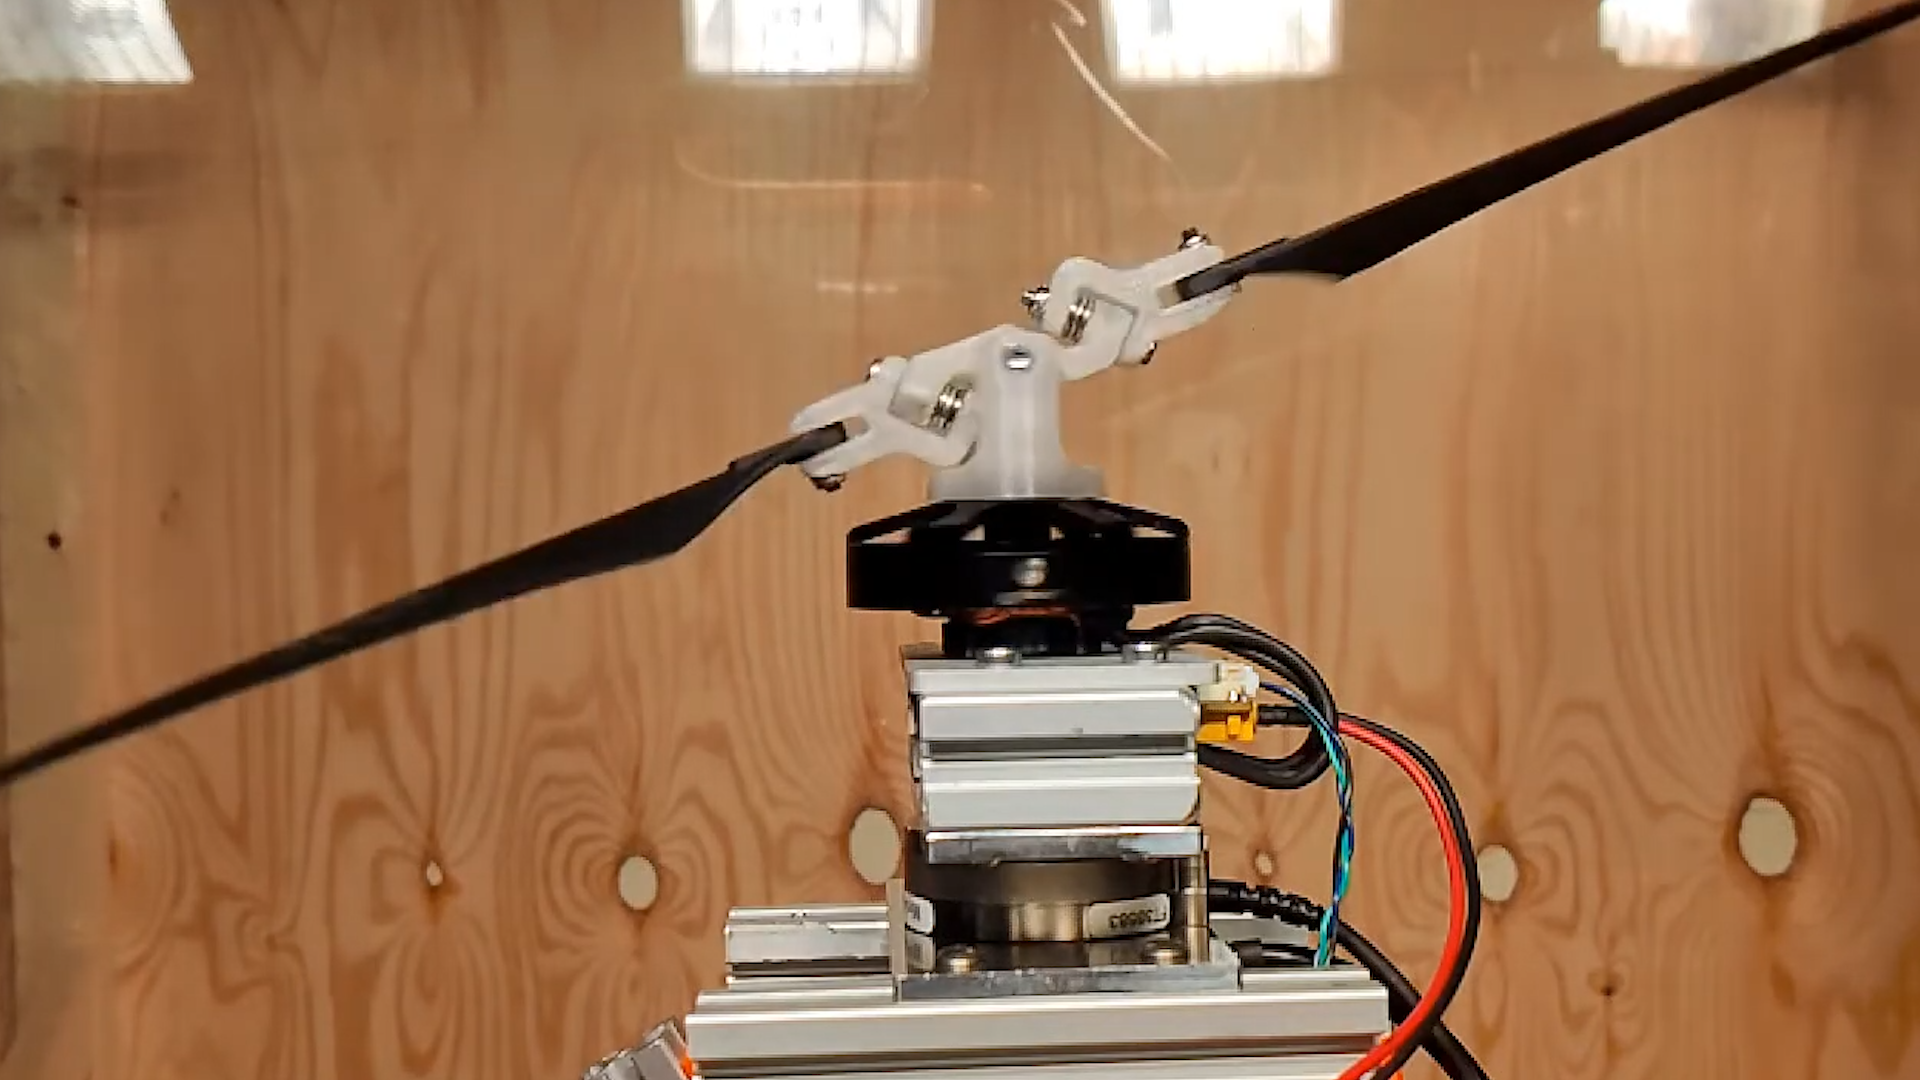
make- Having the rotor under test in a protected enclosure
- Wearing PPE(glasses, ear protection)
- Assuring the rotor is securely fastened and is not damaged
Configure the motor command sequence to be generated in src/main_calibration.cpp.
After configuring and building the project, you can run the calibration by executing the generated binary file. Please ensure that your Moteus motor driver, Raspberry Pi, and test stand setup are properly connected and configured before running the calibration. The Moteus controller should be connected to the "JC1" CAN port on the Pi3Hat.
sudo ./build/main_calibration
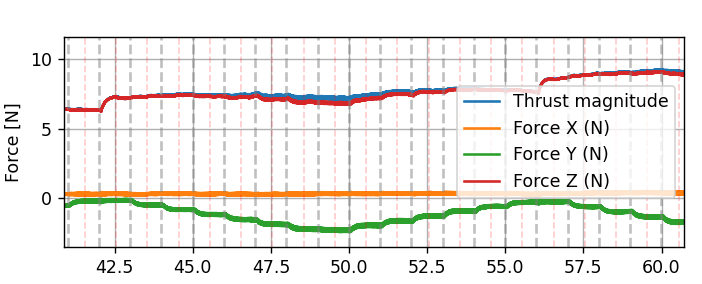
To analyze the calibration, prepare recorded motor telemetry and force/torque measurements. If the force measurements are not synced, this must be performed manually.
Use scripts/plot_single_datase.py to visualize force/torque measurements against motor telemetry with the generated sequences highlighted. Note the timeshift between this data. The force/torque csv file
should be updated with a header element Force Time Offset = 0.0. Update this with the manual timeshift. Running scripts/plot_single_datase.py again should now show synchronized data.